> ## Documentation Index
> Fetch the complete documentation index at: https://docs.invup.me/llms.txt
> Use this file to discover all available pages before exploring further.
# Quickstart
> From a new account to a sent invoice, in one sitting.
This page walks the whole loop once. You will create your organization, set up just enough of it to bill something, log an hour of work, and send the invoice.
Allow about twenty minutes. Everything you set up here is real, so you can carry on from it rather than starting again.
If the terms below are unfamiliar, read [Core concepts](/getting-started/core-concepts) first. It is short, and this page assumes it.
Sign up with an email address and password, or continue with Google or GitHub.
If you signed up with an email address, Invup sends you a verification link. Open it before carrying on.
 Turn on two factor authentication once you are in. This account will hold your clients' billing details and your revenue history, so it is worth the thirty seconds. See [Create your account](/setup/create-your-account).
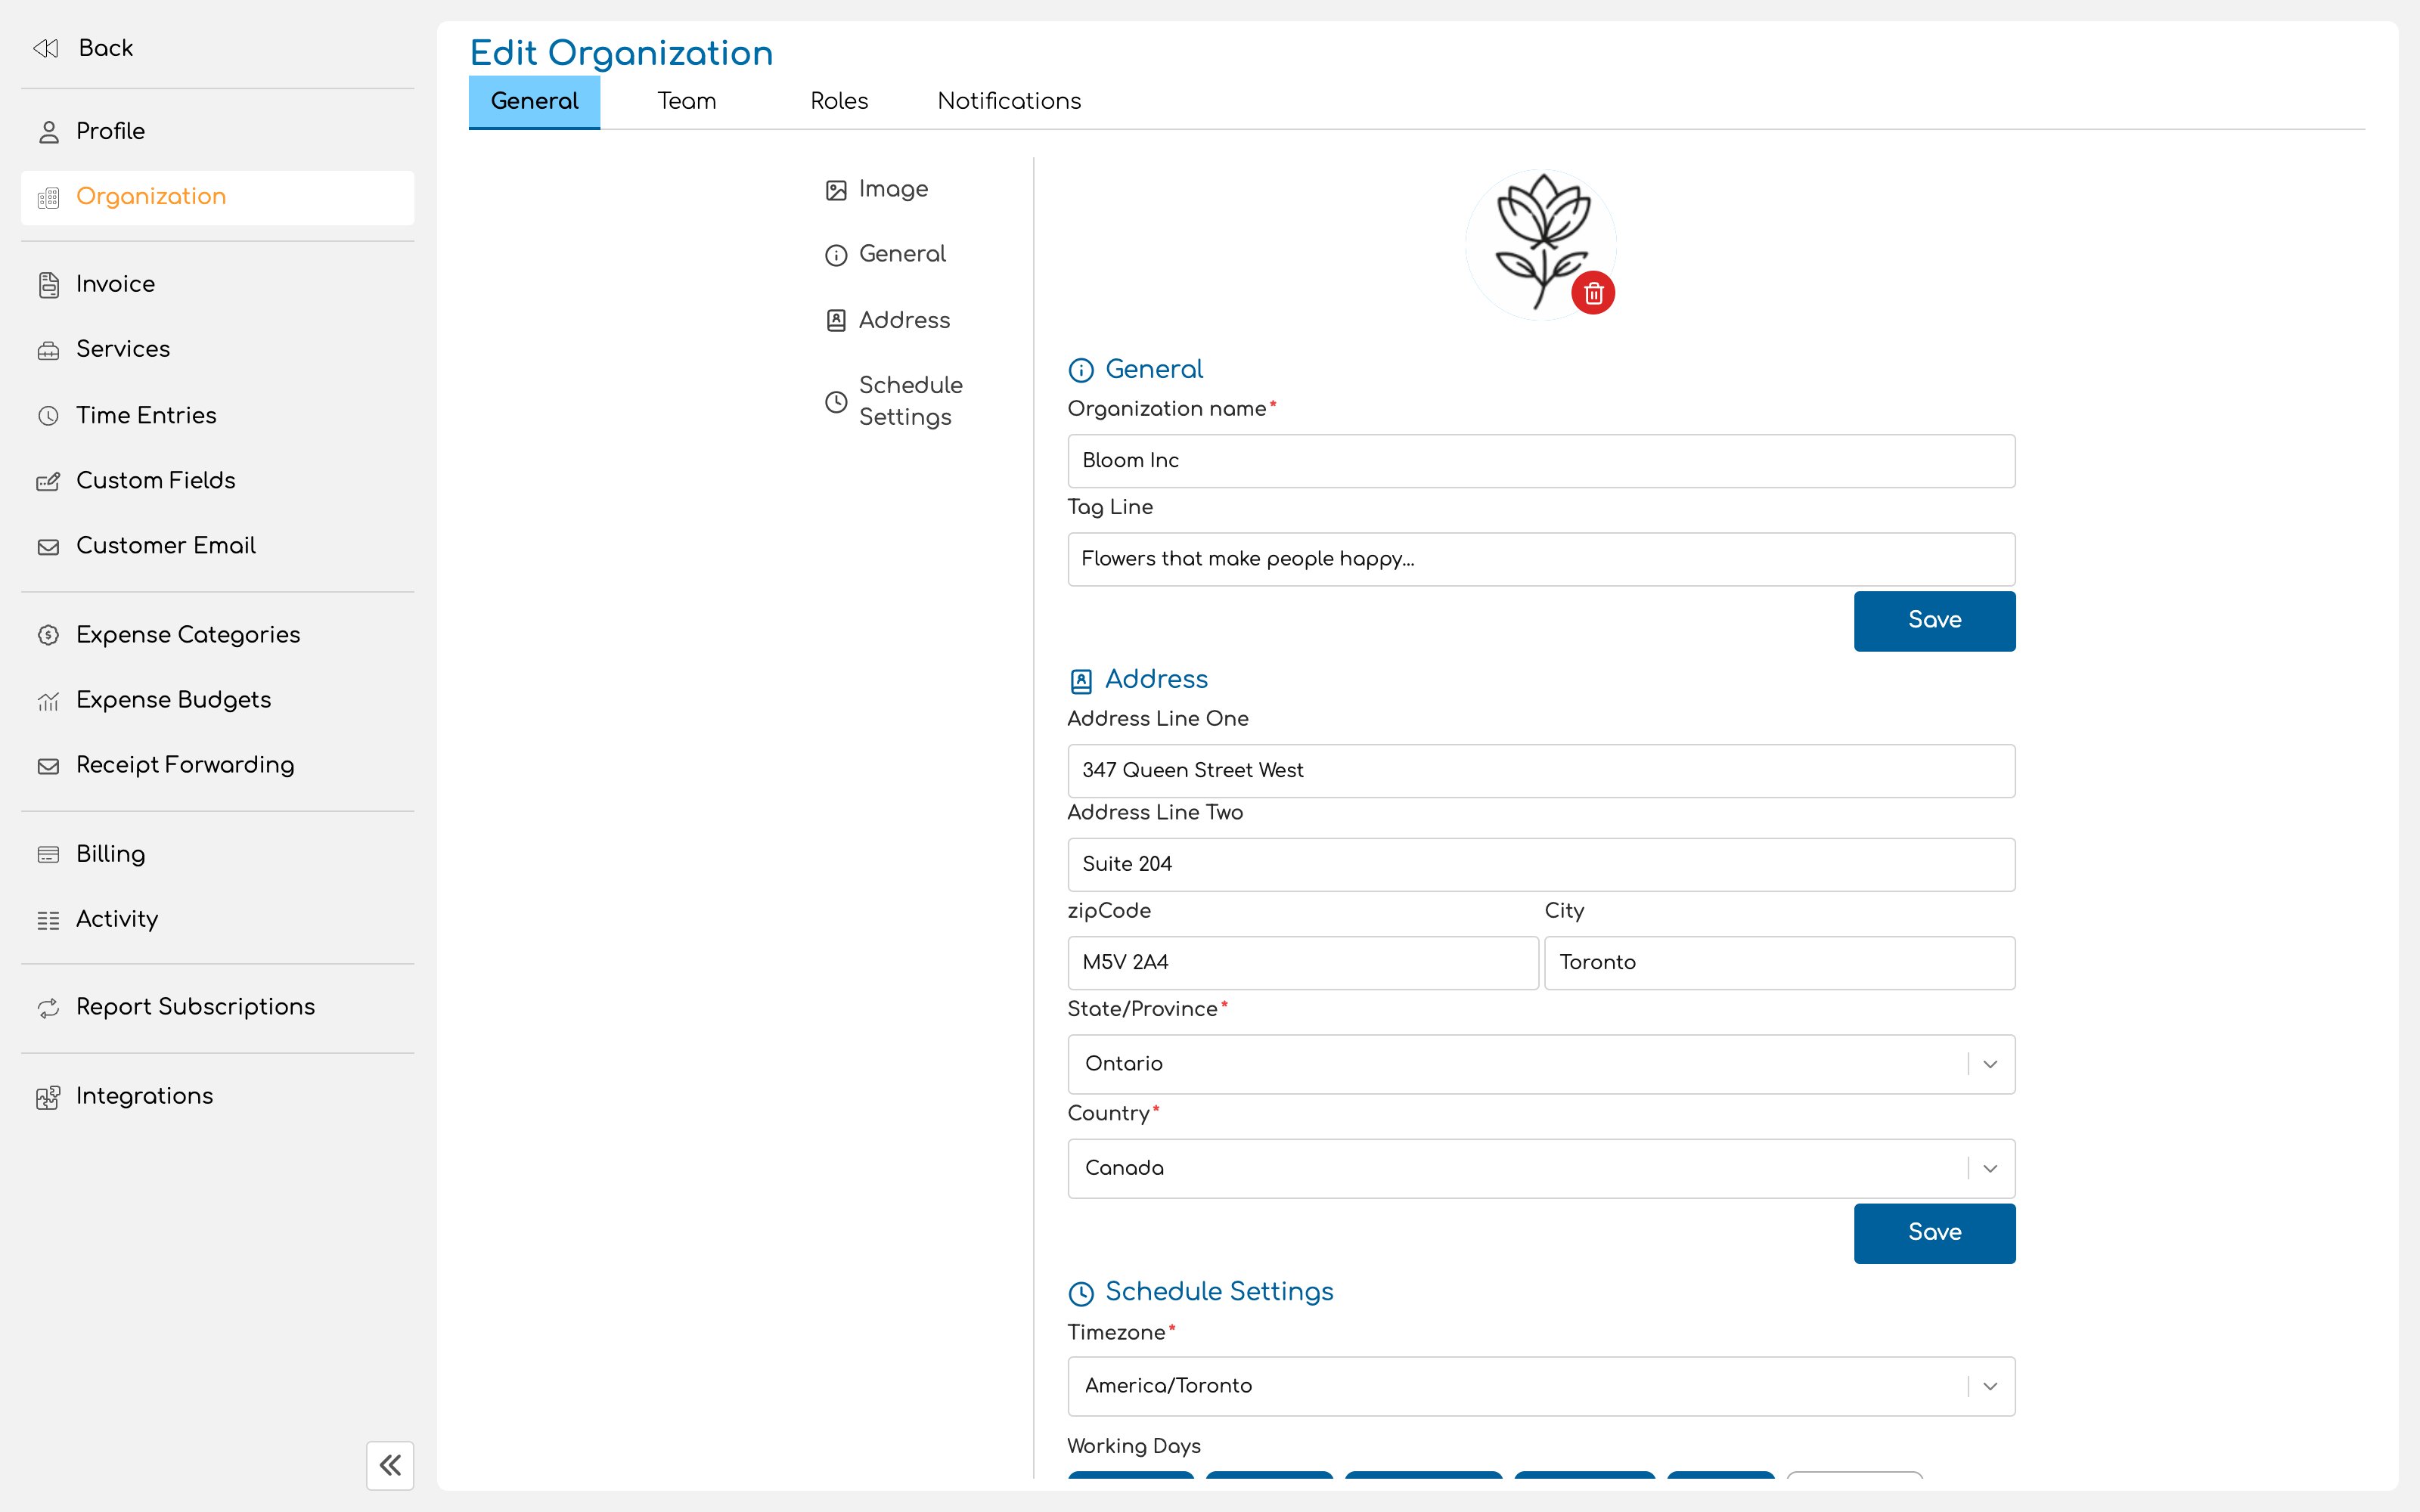
Your organization is your business inside Invup. Give it a name, then set two things straight away.
**Timezone**, because every date and time in the product is displayed in it. Set it to where your business operates, not where you happen to be sitting today.
**Working days**, being the days your business runs.
Add your logo and business address while you are here. Both appear on the invoices your clients receive, so it is better to do this once than to fix it after the first invoice has gone out looking bare.
Turn on two factor authentication once you are in. This account will hold your clients' billing details and your revenue history, so it is worth the thirty seconds. See [Create your account](/setup/create-your-account).
Your organization is your business inside Invup. Give it a name, then set two things straight away.
**Timezone**, because every date and time in the product is displayed in it. Set it to where your business operates, not where you happen to be sitting today.
**Working days**, being the days your business runs.
Add your logo and business address while you are here. Both appear on the invoices your clients receive, so it is better to do this once than to fix it after the first invoice has gone out looking bare.
 Full detail in [Organization profile](/setup/organization-profile).
Create the client you are going to bill. You need a name and the billing details that should appear on the invoice, plus at least one contact. The contact is the person who receives the invoice email and opens the payment link.
One client is enough to get through this page. Add the rest later.
Full detail in [Add your clients](/setup/add-your-clients).
A service is a type of billable work, such as consultation, site visit or design review. Create one that matches something your business actually does, and give it an hourly rate.
Services are optional. If you bill one rate regardless of the type of work, skip this step and set the rate on the project instead.
Full detail in [Define your services](/setup/define-your-services).
Create a project for the client you just added, and choose its type. Pick **Hourly** if you bill for time spent, or **Fixed** if you have agreed a sum for the whole job.
If you created a service, enable services on the project and attach it. If you did not, set the project's hourly rate directly.
Add yourself as a project member so that you can log time against it.
Full detail in [Create your first project](/setup/create-your-first-project).
Log some work. Pick the project, the date, and how long it took. If the project uses services, pick the service too.
You will not be asked for a rate. Invup resolves it from the rates you set in the previous two steps, which is the whole point of setting them there.
Leave the entry billable. Non billable entries are tracked but never reach an invoice.
Start a new invoice for your client. Invup offers you their unbilled time entries and expenses, so select the entry you just logged and pull it onto the invoice.
Before sending, decide how much detail the client sees. The same work can appear as one summary line or as every individual entry, depending on the grouping you choose.
Add tax if it applies, and check the due date against your payment terms.
Sending emails the invoice to your client's contact, with a link to the portal where they can read it and pay it.
Invup asks you to confirm before anything leaves. Sending is never a single stray click.
While you are finding your feet, send the first one to yourself. Add your own email address as a contact on a test client and see exactly what your clients will see.
Connect Stripe to accept card payments through the portal. Payments made that way record themselves against the invoice.
Paid by cheque or bank transfer instead? Record the payment against the invoice by hand and the balance updates the same way.
Full detail in [Connect Stripe](/setup/connect-stripe).
## What you have built
A client, a service, a project, a tracked hour, and an invoice on its way. That is the entire loop. Everything else in Invup makes some part of it faster, more automatic, or more precise.
## Next
Bring in the people who will be logging the work, and decide what each of them can see.
Numbering, payment terms, logo, and the reminders that chase payment for you.
Full detail in [Organization profile](/setup/organization-profile).
Create the client you are going to bill. You need a name and the billing details that should appear on the invoice, plus at least one contact. The contact is the person who receives the invoice email and opens the payment link.
One client is enough to get through this page. Add the rest later.
Full detail in [Add your clients](/setup/add-your-clients).
A service is a type of billable work, such as consultation, site visit or design review. Create one that matches something your business actually does, and give it an hourly rate.
Services are optional. If you bill one rate regardless of the type of work, skip this step and set the rate on the project instead.
Full detail in [Define your services](/setup/define-your-services).
Create a project for the client you just added, and choose its type. Pick **Hourly** if you bill for time spent, or **Fixed** if you have agreed a sum for the whole job.
If you created a service, enable services on the project and attach it. If you did not, set the project's hourly rate directly.
Add yourself as a project member so that you can log time against it.
Full detail in [Create your first project](/setup/create-your-first-project).
Log some work. Pick the project, the date, and how long it took. If the project uses services, pick the service too.
You will not be asked for a rate. Invup resolves it from the rates you set in the previous two steps, which is the whole point of setting them there.
Leave the entry billable. Non billable entries are tracked but never reach an invoice.
Start a new invoice for your client. Invup offers you their unbilled time entries and expenses, so select the entry you just logged and pull it onto the invoice.
Before sending, decide how much detail the client sees. The same work can appear as one summary line or as every individual entry, depending on the grouping you choose.
Add tax if it applies, and check the due date against your payment terms.
Sending emails the invoice to your client's contact, with a link to the portal where they can read it and pay it.
Invup asks you to confirm before anything leaves. Sending is never a single stray click.
While you are finding your feet, send the first one to yourself. Add your own email address as a contact on a test client and see exactly what your clients will see.
Connect Stripe to accept card payments through the portal. Payments made that way record themselves against the invoice.
Paid by cheque or bank transfer instead? Record the payment against the invoice by hand and the balance updates the same way.
Full detail in [Connect Stripe](/setup/connect-stripe).
## What you have built
A client, a service, a project, a tracked hour, and an invoice on its way. That is the entire loop. Everything else in Invup makes some part of it faster, more automatic, or more precise.
## Next
Bring in the people who will be logging the work, and decide what each of them can see.
Numbering, payment terms, logo, and the reminders that chase payment for you.