Creating Invoices from Time Entries
Invup can automatically generate invoice line items from your team's tracked time entries. Instead of manually typing line items, you select a client, narrow down which time entries to include, choose how to group them, and Invup builds the invoice for you — with amounts calculated from each entry's resolved hourly rate.
This guide walks through the invoice creation wizard step by step.
Who Can Use This Feature
The "From Time Entries" option is available to Owners and Admins. Team members with the Member role can still create invoices from scratch, but they will not see the time entries wizard. Contributors do not have access to invoice creation.
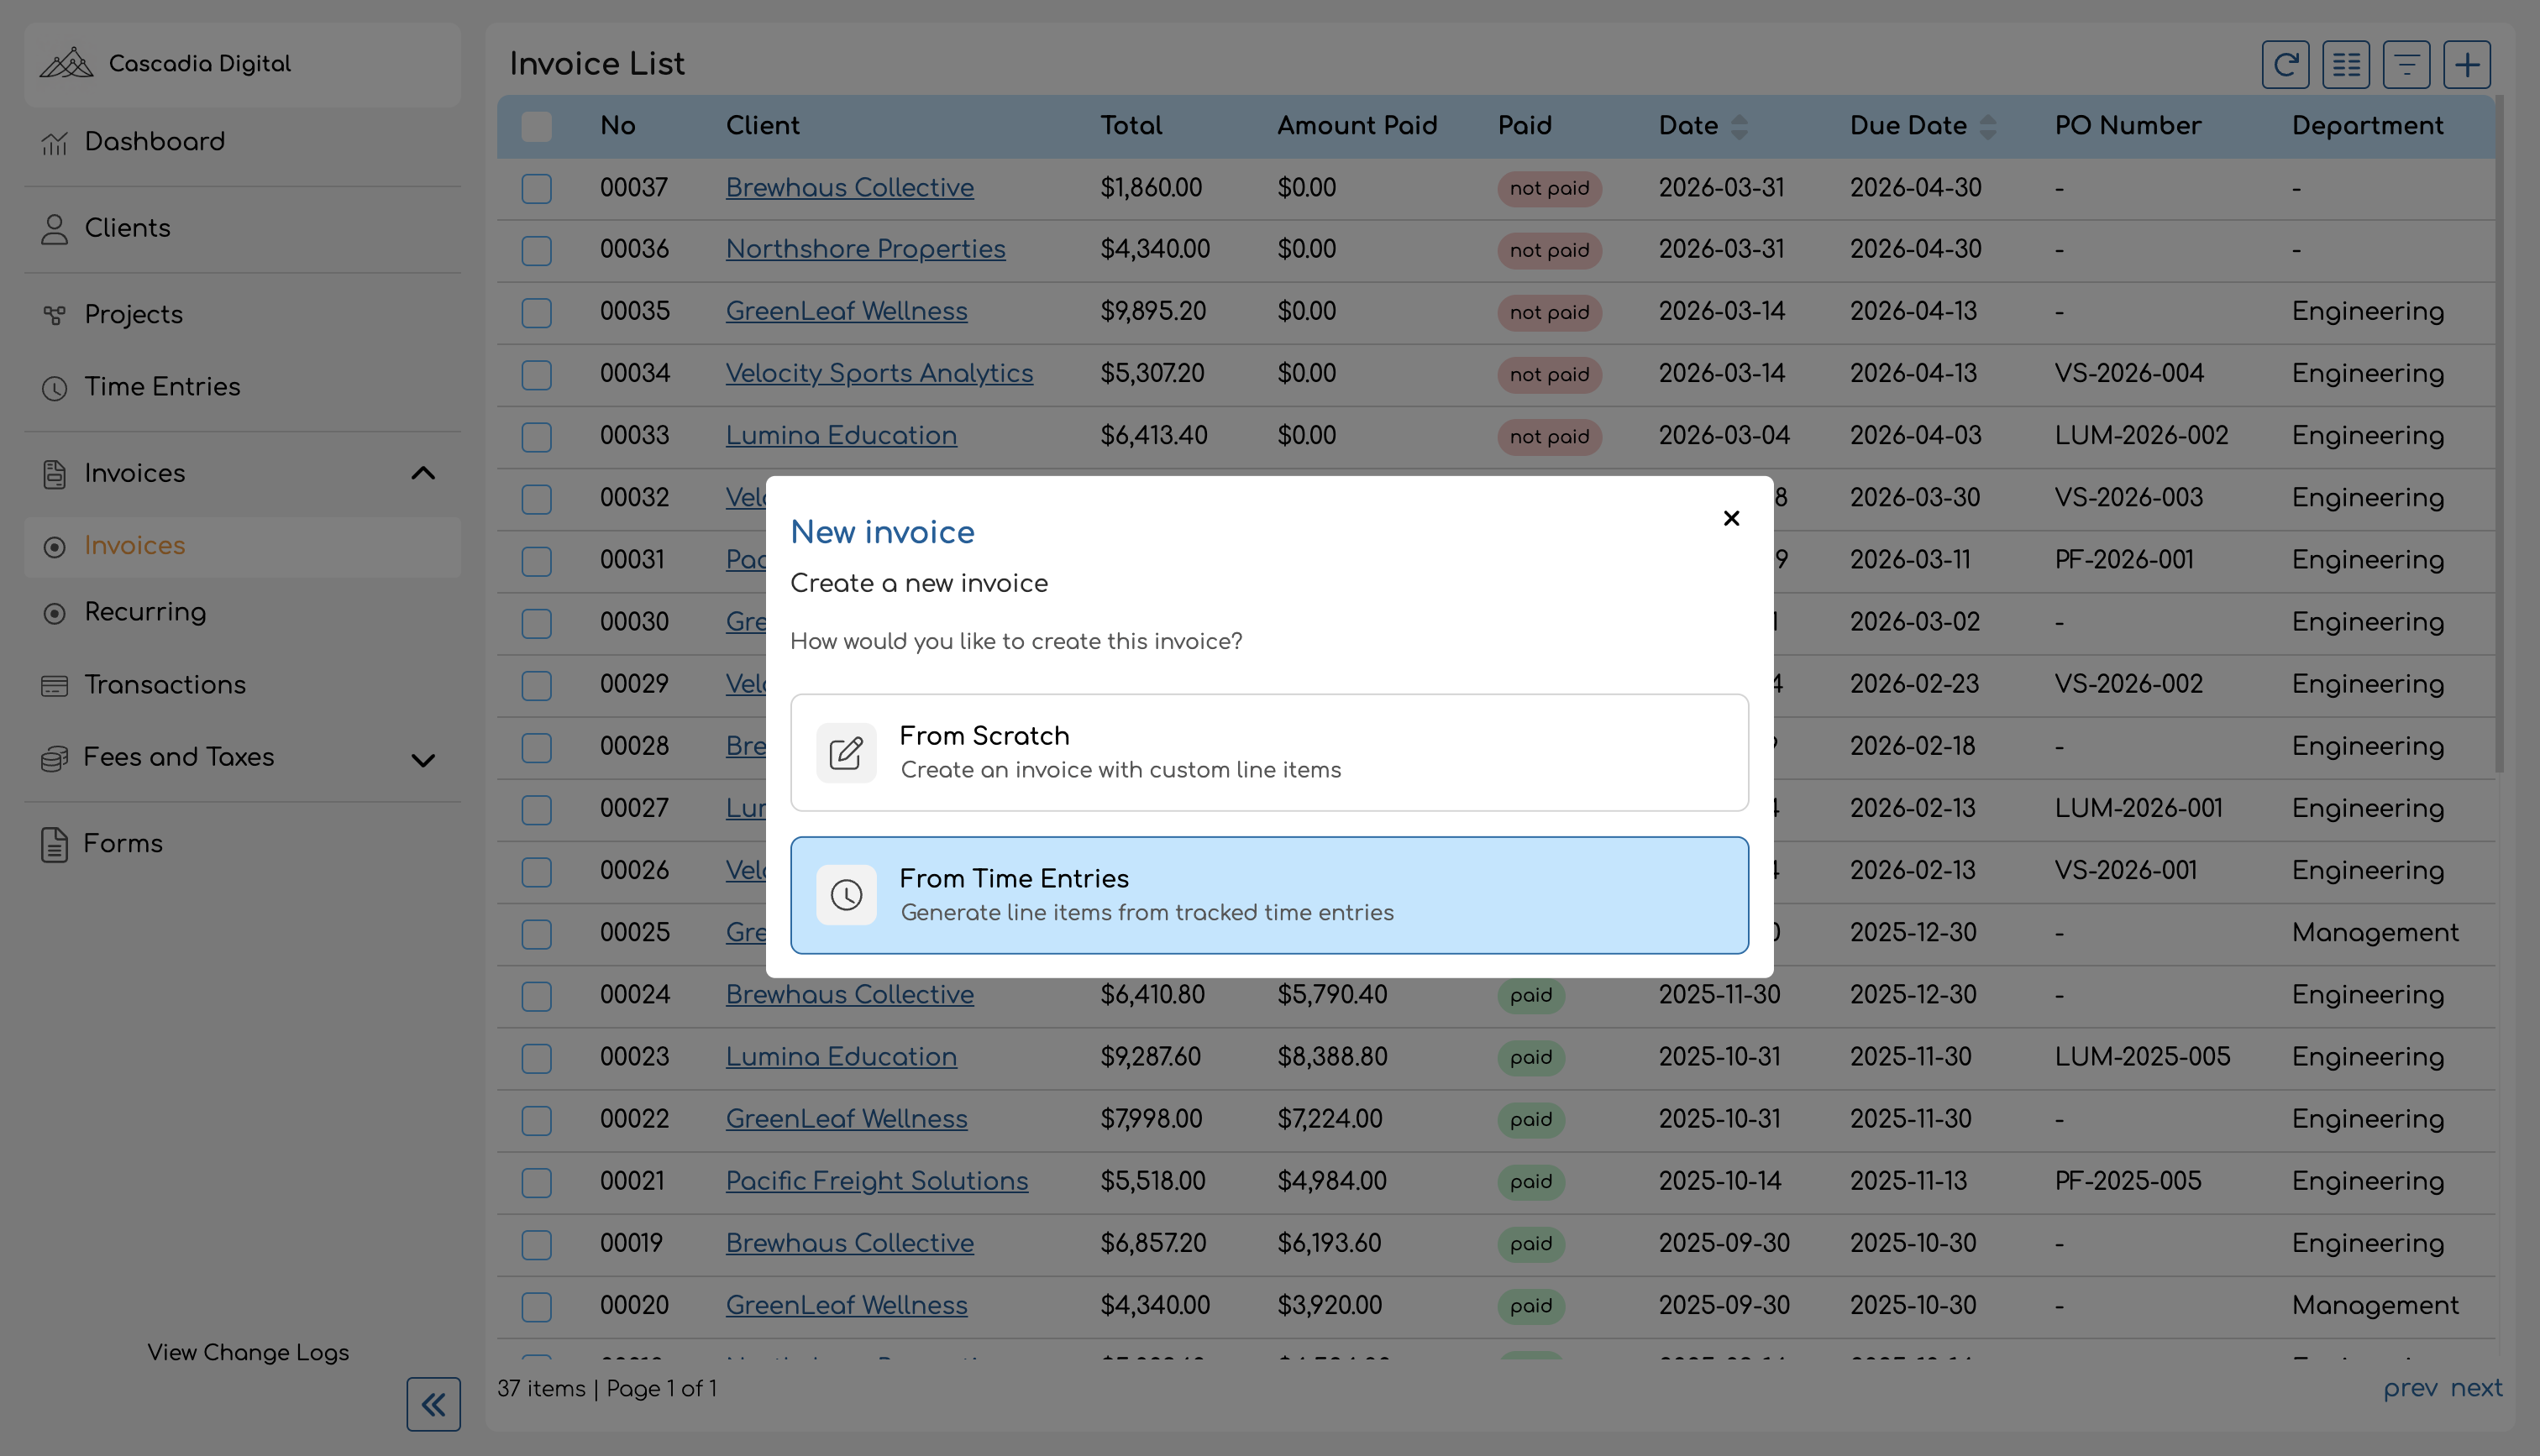
Opening the Wizard
Step 1: Select a Client
The first step asks you to choose which client to invoice. The list only shows clients that have projects with recorded time entries — clients with no tracked time will not appear.
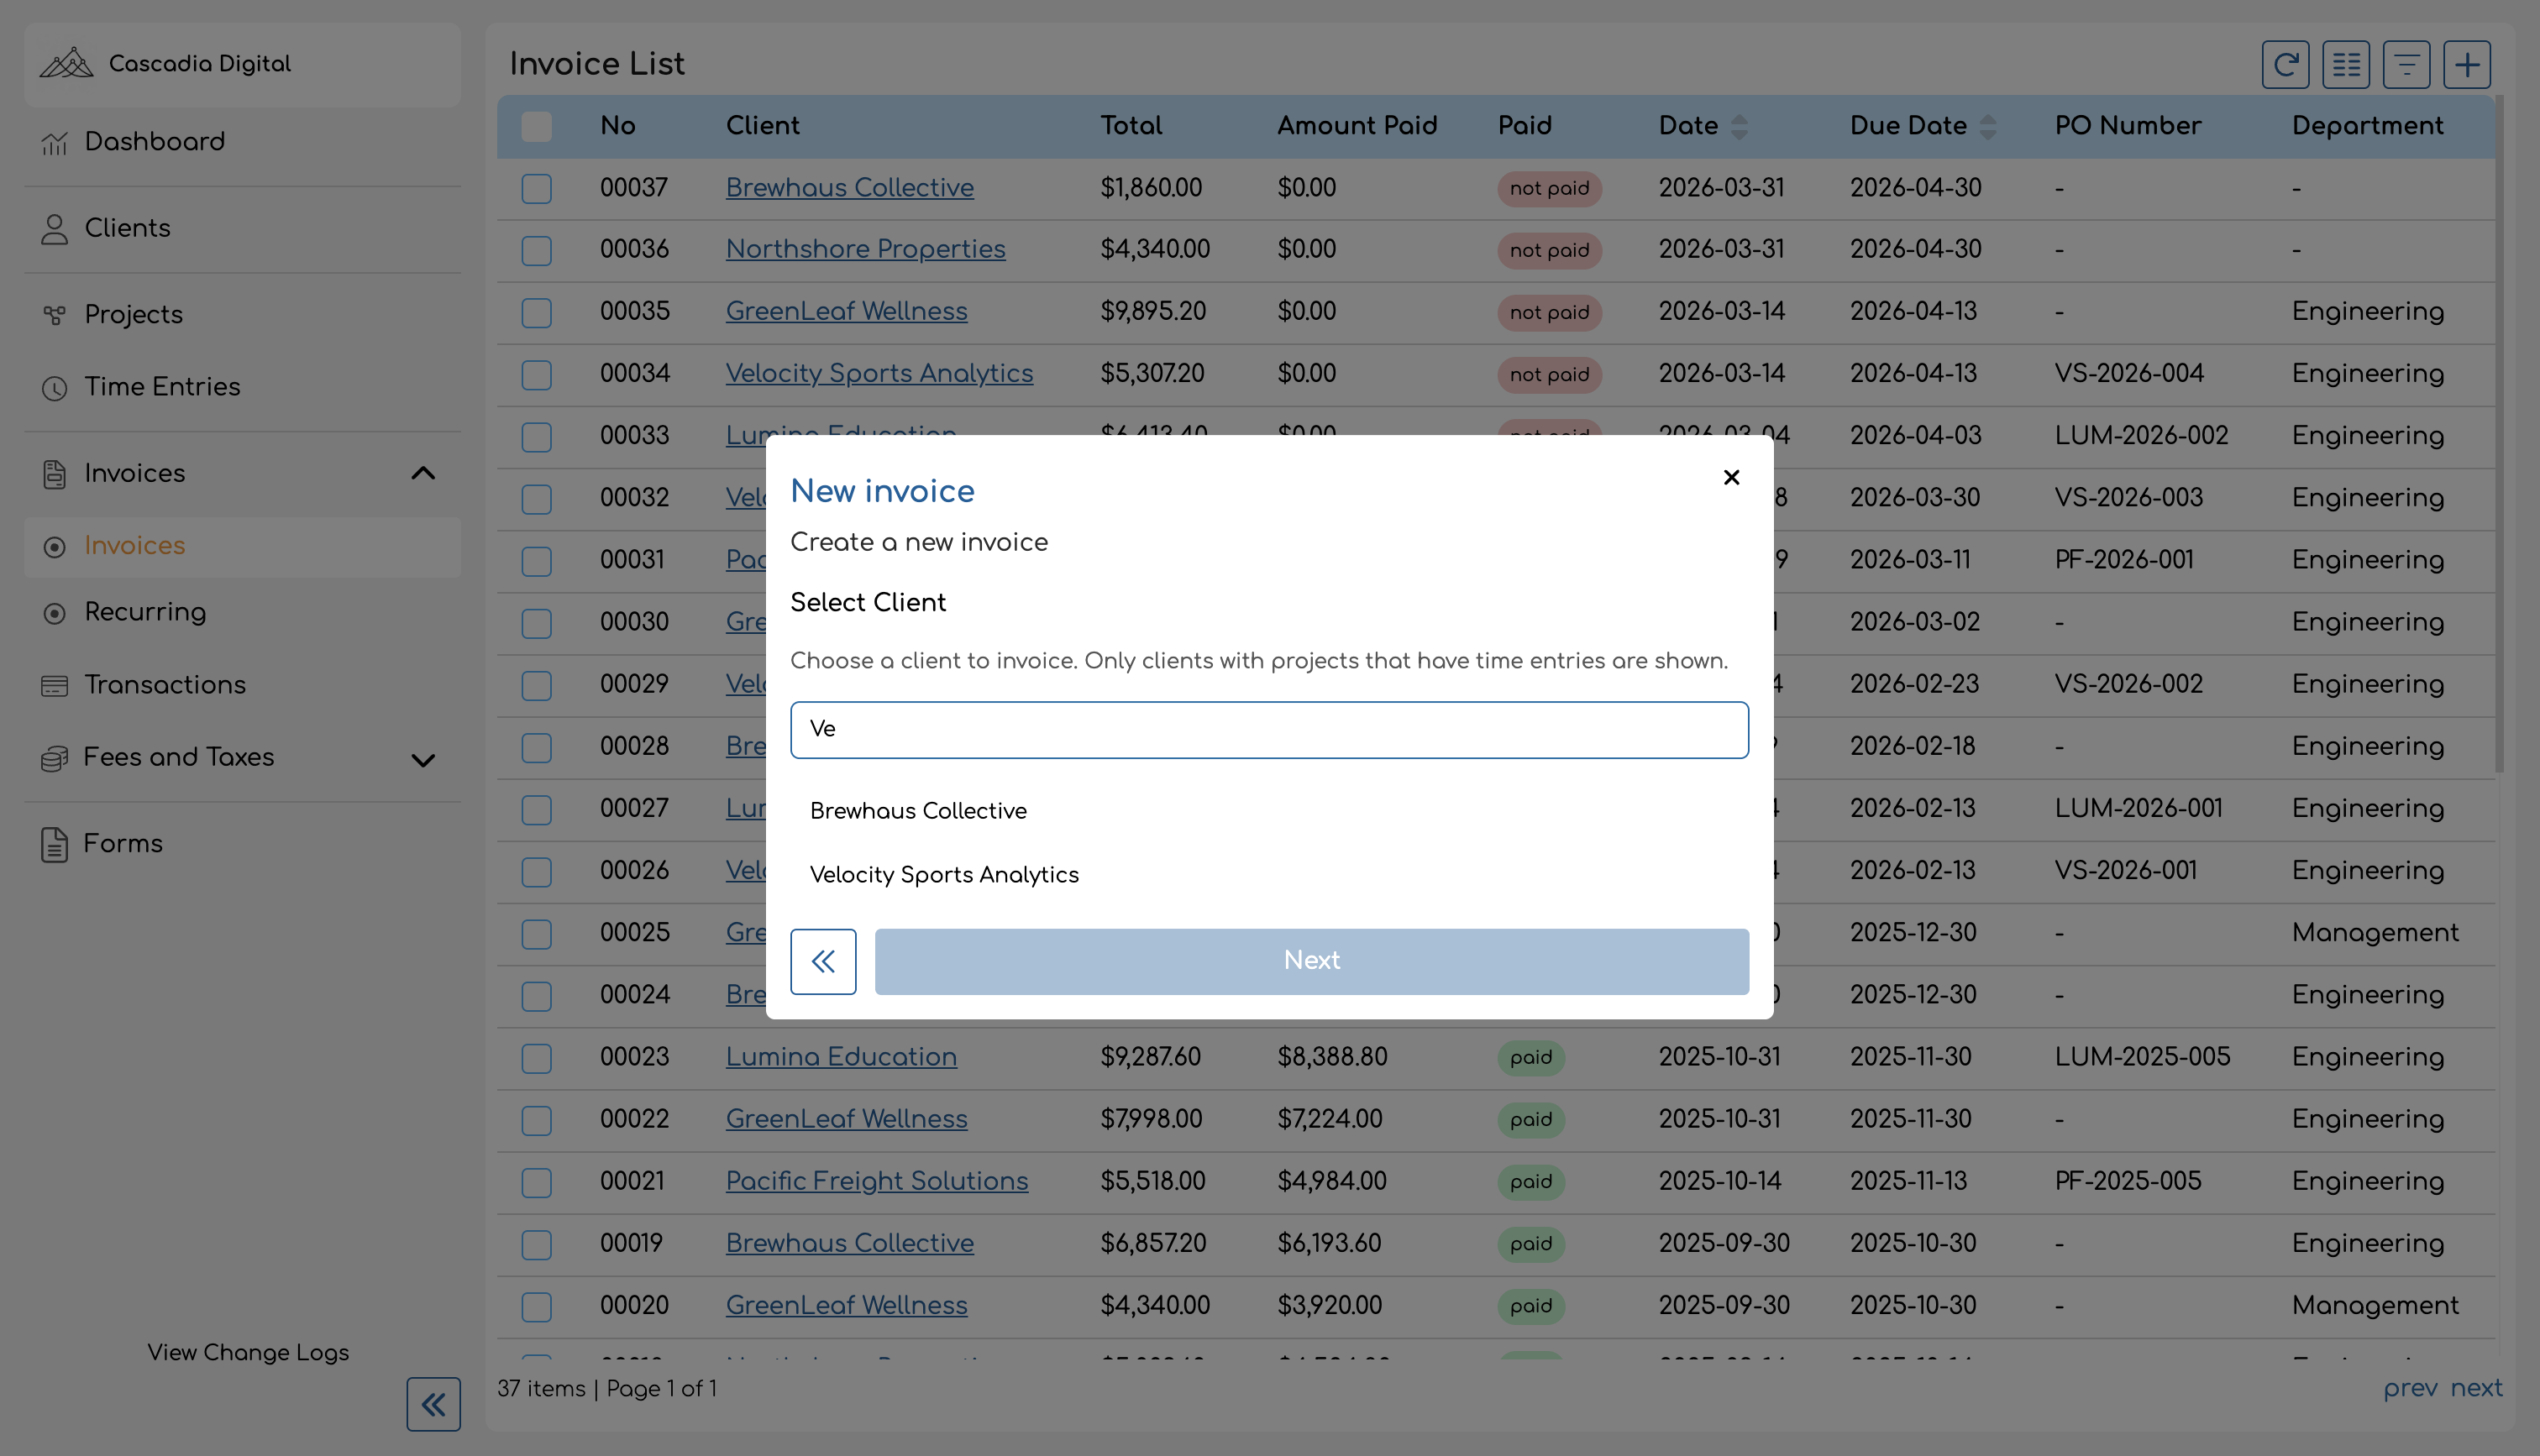
Use the search field at the top to filter by client name. Click a client to select them (the selected client is highlighted), then click Next to continue.
If you don't see a client you expect, confirm that at least one of their projects has time entries logged against it.
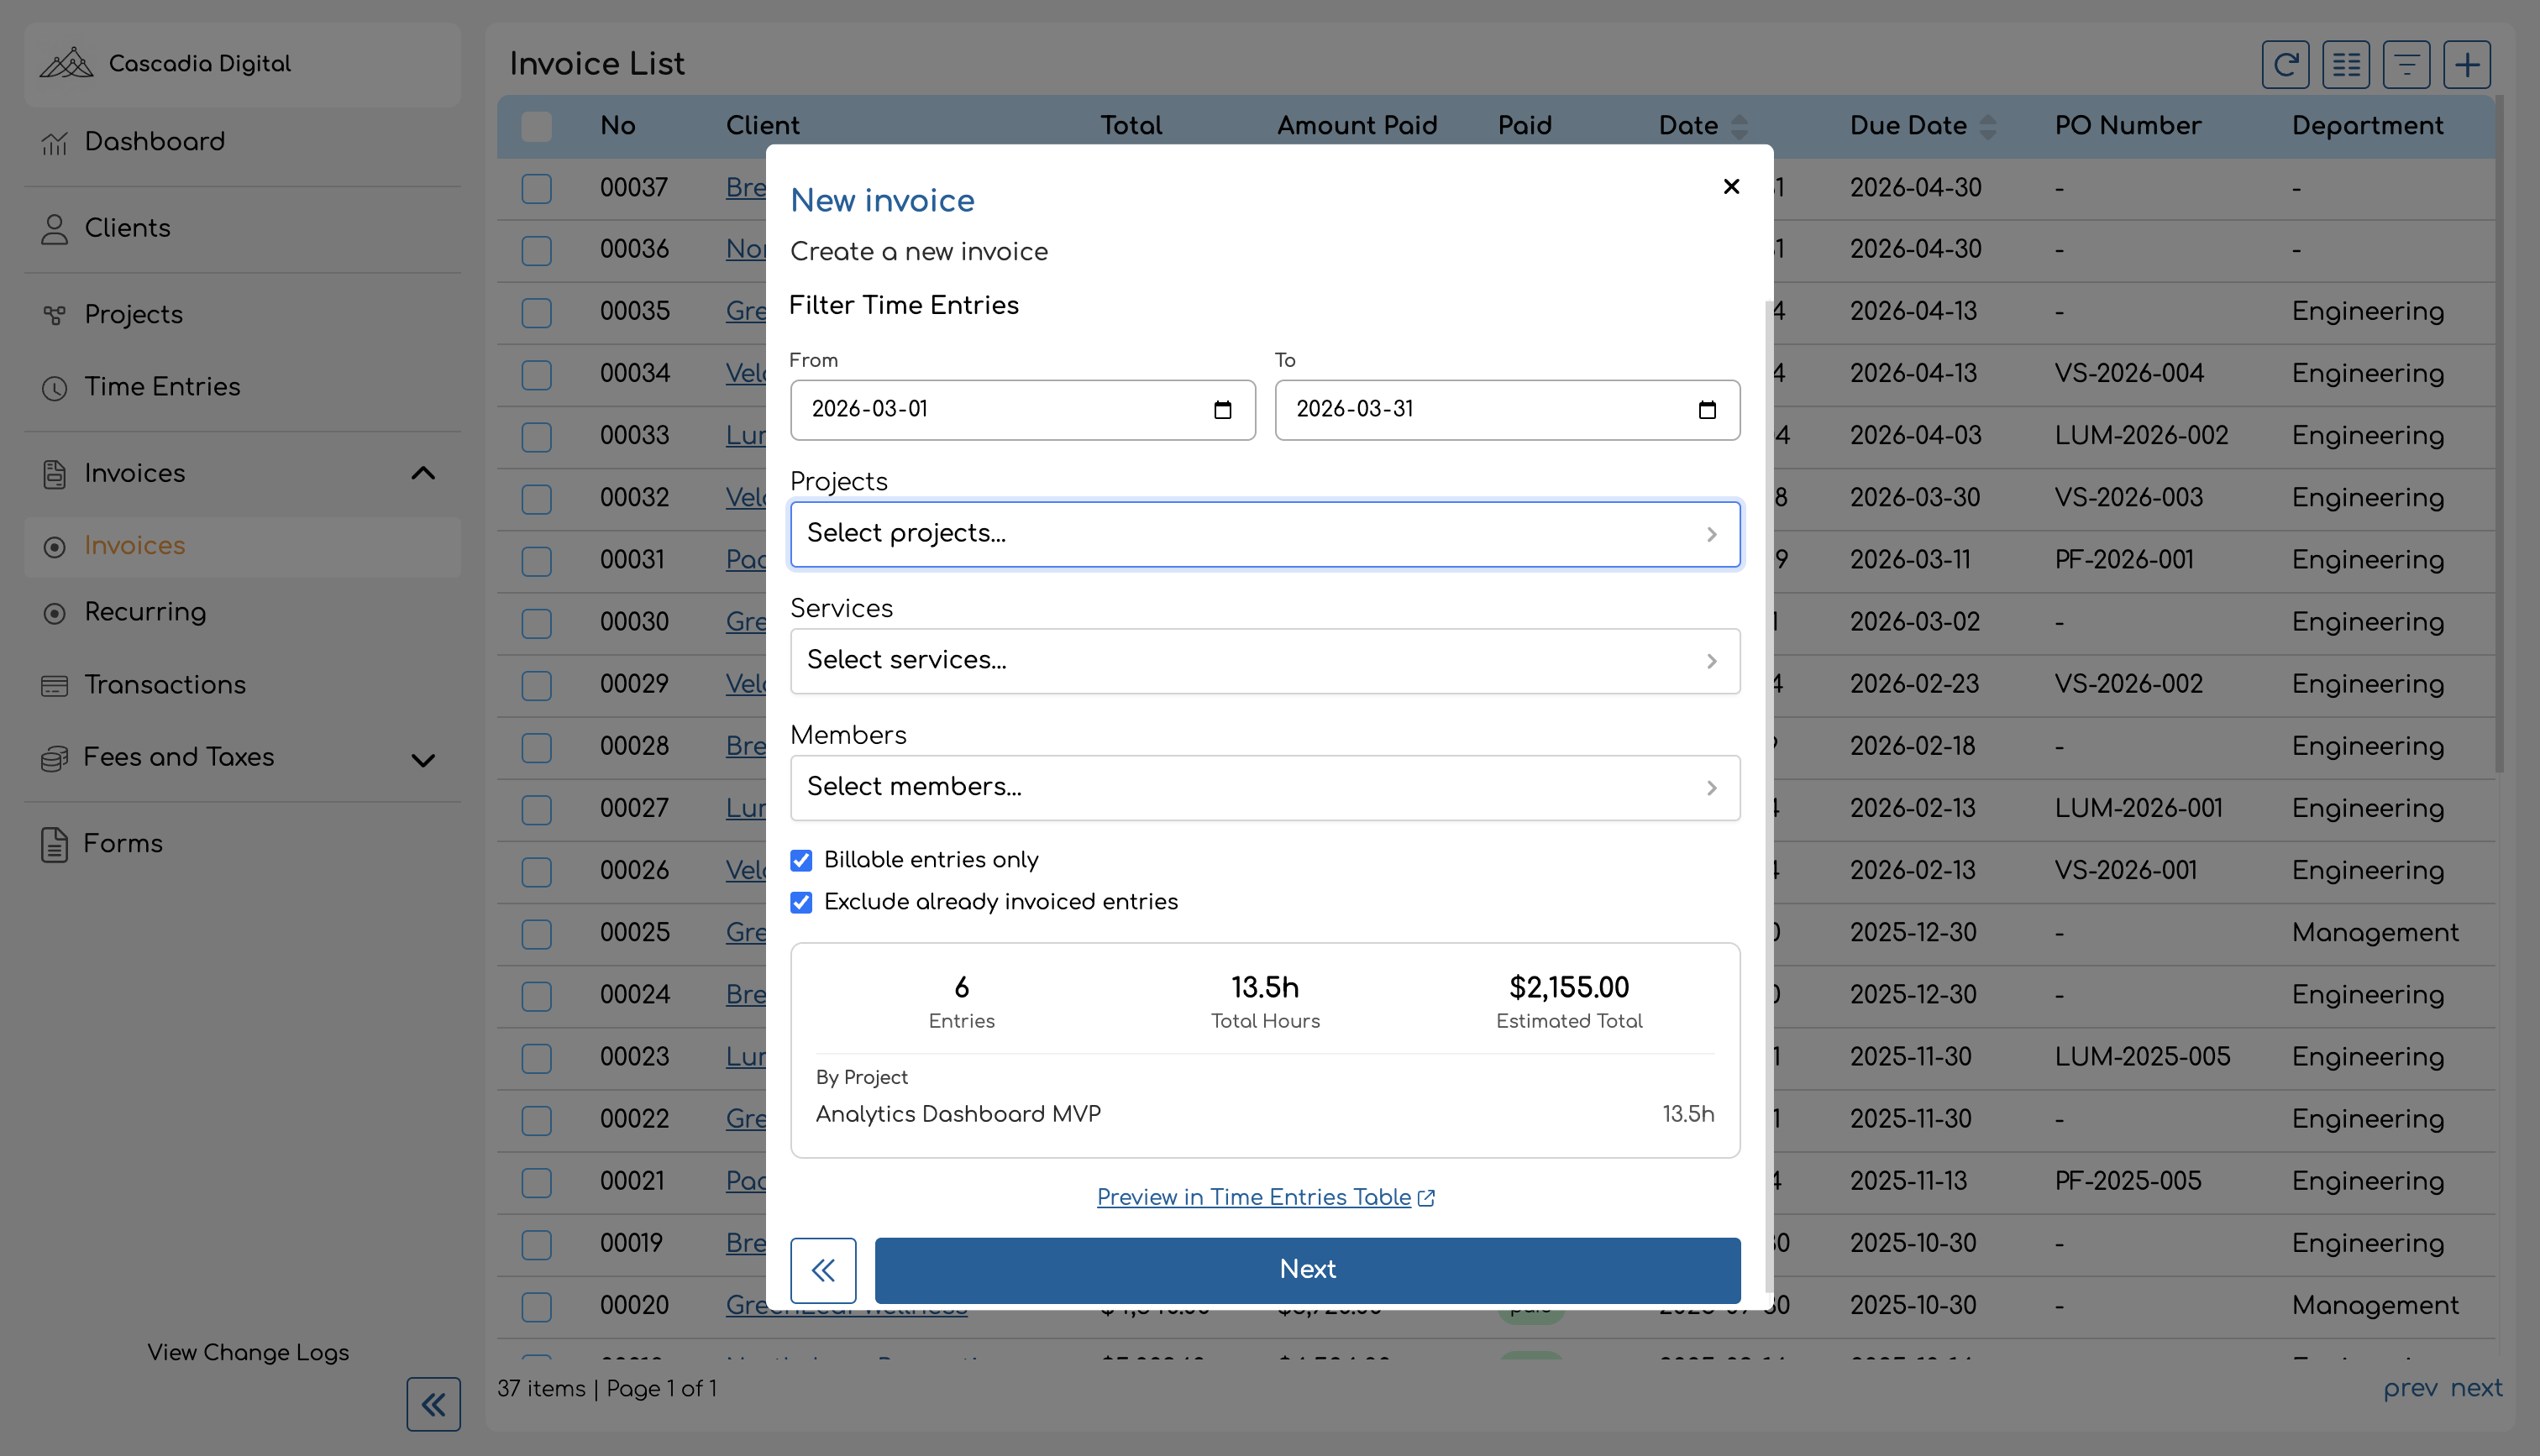
Step 2: Configure Filters
After selecting a client, you'll see the Filter Time Entries step. This is where you narrow down exactly which time entries should be included in the invoice.
Available Filters
| Filter | Description | Default |
|---|---|---|
| From / To | Date range for the time entries to include. | First and last day of the previous month |
| Projects | Limit to specific projects. Leave empty to include all of the client's projects. | All projects |
| Services | Limit to specific services. Leave empty to include all services. | All services |
| Members | Limit to specific team members. Leave empty to include entries from all team members. | All team members |
| Billable entries only | When enabled, excludes time entries logged against non-billable services. | Enabled |
| Exclude already invoiced entries | When enabled, excludes time entries that are already attached to another invoice. | Enabled |
The date range defaults to the previous month based on your organization's timezone. For example, if today is April 4 and your organization is set to Eastern Time, the default range would be March 1 to March 31.
Both toggle filters — Billable entries only and Exclude already invoiced entries — are enabled by default to prevent accidentally invoicing non-billable work or double-invoicing entries.
Stats Preview Panel
As you adjust filters, the preview panel on the right updates automatically to show:
- Entries — the number of time entries that match your filters.
- Total Hours — the combined duration of all matching entries.
- Estimated Total — the total dollar amount calculated from each entry's hourly rate multiplied by its duration.
- By Project — a breakdown showing the hours and amount for each project individually.
The estimated total is calculated using each time entry's current rate. If an entry already has a locked rate, that locked rate is used. Otherwise, Invup resolves the rate dynamically from the rate hierarchy.
If no entries match your filters, the panel displays "No time entries match the current filters" and you won't be able to proceed.
Preview in Time Entries Table
Below the stats panel, there is a Preview in Time Entries Table link (with an external-link icon). Clicking it opens the Time Entries page in a new tab with your current filters pre-applied, so you can review the individual entries before generating the invoice. This is useful for spot-checking entries or verifying that the right work is included.
Once you're satisfied with the selected entries, click Next.
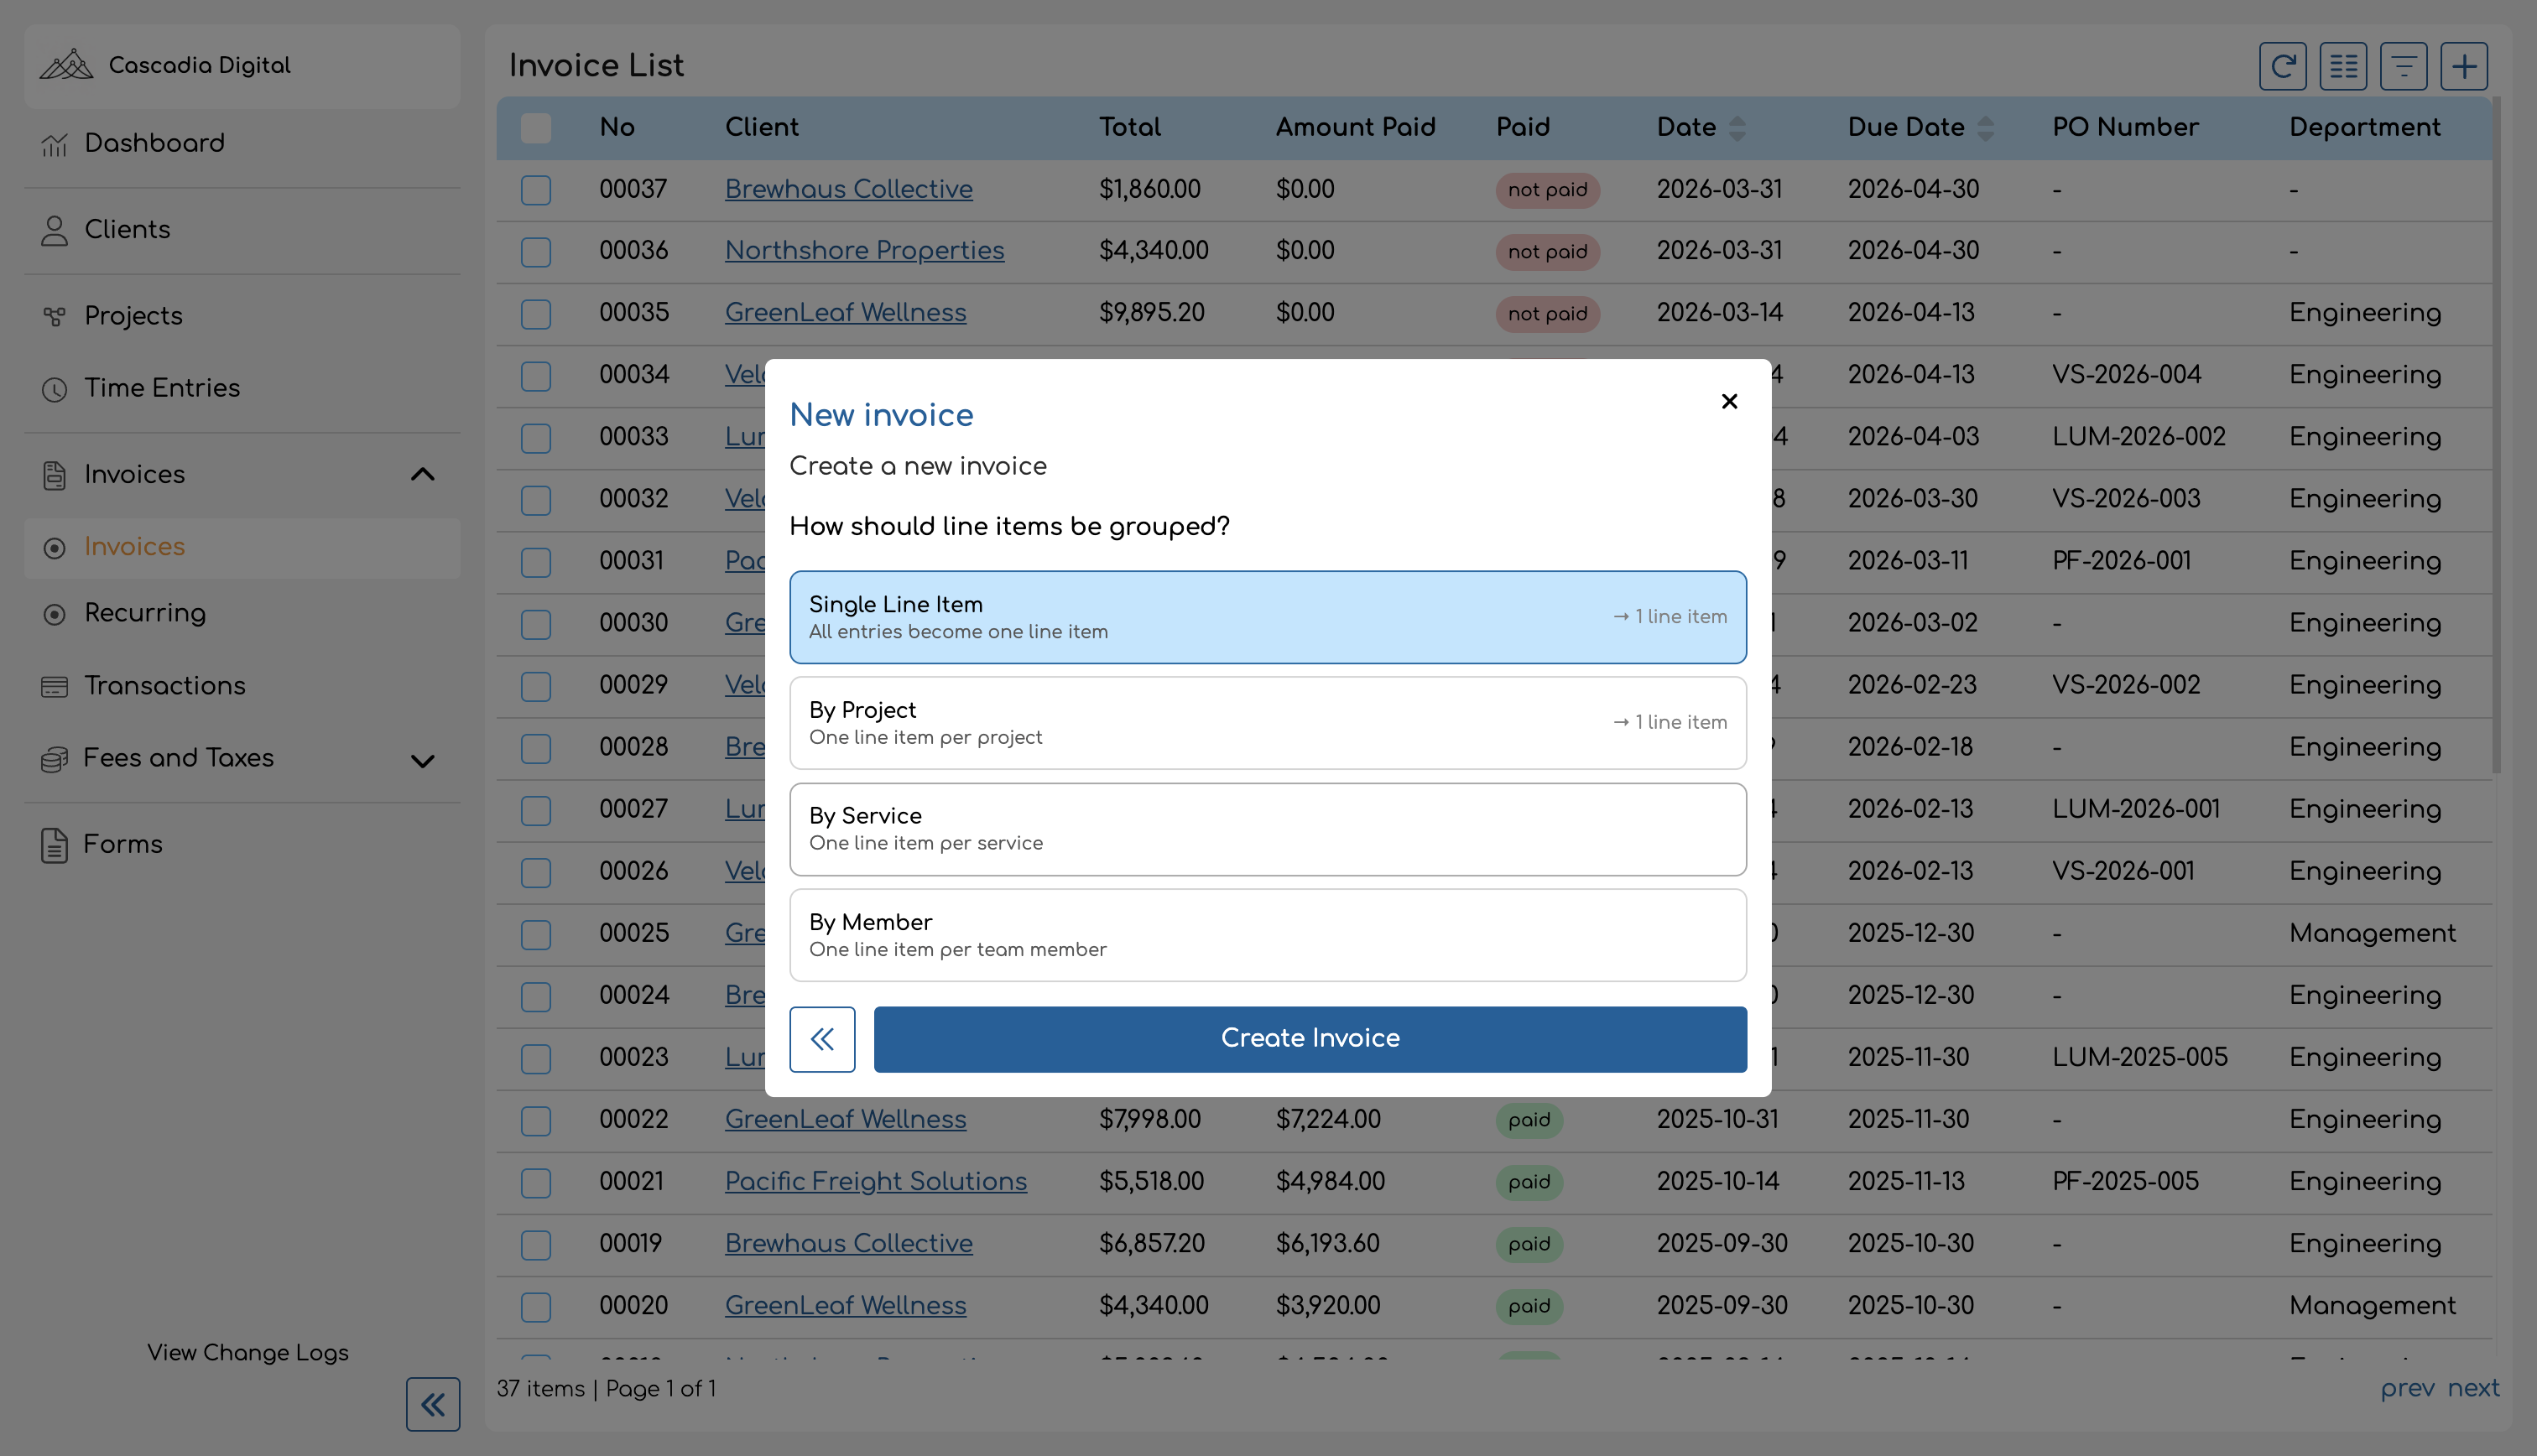
Step 3: Choose a Grouping Strategy
The final step before creating the invoice is choosing how the selected time entries should be grouped into invoice line items.
| Grouping Option | What It Does | Example |
|---|---|---|
| Single Line Item | All entries are combined into one line item. | 1 line item for all work |
| By Project | One line item is created for each project. | 3 projects = 3 line items |
| By Service | One line item is created for each service. | "Design" and "Development" = 2 line items |
| By Member | One line item is created for each team member. | 4 team members = 4 line items |
Each option shows the expected number of line items it will produce (when available), so you can see the result before committing.
How Line Item Amounts Are Calculated
For each group of entries, Invup checks whether all entries in that group share the same hourly rate:
- Same rate: The line item shows the total hours as the quantity and the shared rate as the unit price. For example, 10 hours at $150/hr = $1,500.
- Mixed rates: The line item shows a quantity of 1 with the pre-calculated total as the unit price. For example, if the group totals $2,340 across different rates, the line item will display 1 x $2,340.
Line Item Names
Each line item is named based on the grouping strategy:
- Single Line Item: A comma-separated list of project names with the date range — e.g., "Website Redesign, Brand Strategy (Mar 1 – Mar 31, 2026)".
- By Project: The project name — e.g., "Website Redesign".
- By Service: The service name — e.g., "Consulting". Entries with no service are grouped as "No Service".
- By Member: The team member's name — e.g., "Jane Smith".
Creating the Invoice
After selecting your grouping strategy, click Create Invoice. Invup will:
- Create a new draft invoice for the selected client.
- Generate line items based on your chosen grouping.
- Link each time entry to its corresponding line item so the connection is tracked.
- If your organization's rate lock policy is set to At Invoice, the rates on all included time entries will be locked at this point.
Once the invoice is created, you are taken directly to the invoice detail page where you can:
- Edit line item names or descriptions.
- Add or remove taxes and discounts.
- Adjust the invoice date and due date (defaults to today and 30 days from today, respectively).
- Add any additional line items manually.
- Review and send the invoice to your client.
The time entries included in the invoice are now linked to it. If Exclude already invoiced entries was enabled (the default), these entries will not appear in future invoice wizards — preventing double-invoicing.
Tips and Best Practices
- Review before you create. Use the Preview in Time Entries Table link to scan through entries before generating the invoice. It's easier to adjust filters than to edit the invoice after the fact.
- Use date ranges that match your billing cycle. The default is the previous month, but you can adjust it to match weekly, biweekly, or custom billing periods.
- Choose the right grouping for your client. Some clients prefer a single total, while others want to see work broken down by project or team member. Pick the grouping that matches how your client expects to see the bill.
- Check for non-billable entries. Keep Billable entries only enabled unless you intentionally want to include non-billable work. Non-billable services have a rate of $0, which would pull down your invoice total.
- Rate locking matters. If your organization uses the "At Invoice" rate lock policy, generating an invoice will freeze the rates on all included time entries. This is intentional — it ensures the invoiced amount stays consistent even if rates change later. See Rate Locking for more details.