How to Create and Manage a Project
This guide walks through creating, editing, and managing projects in Invup. For an introduction to what projects are and how they fit into the platform, see the Projects Overview.
Creating a Project
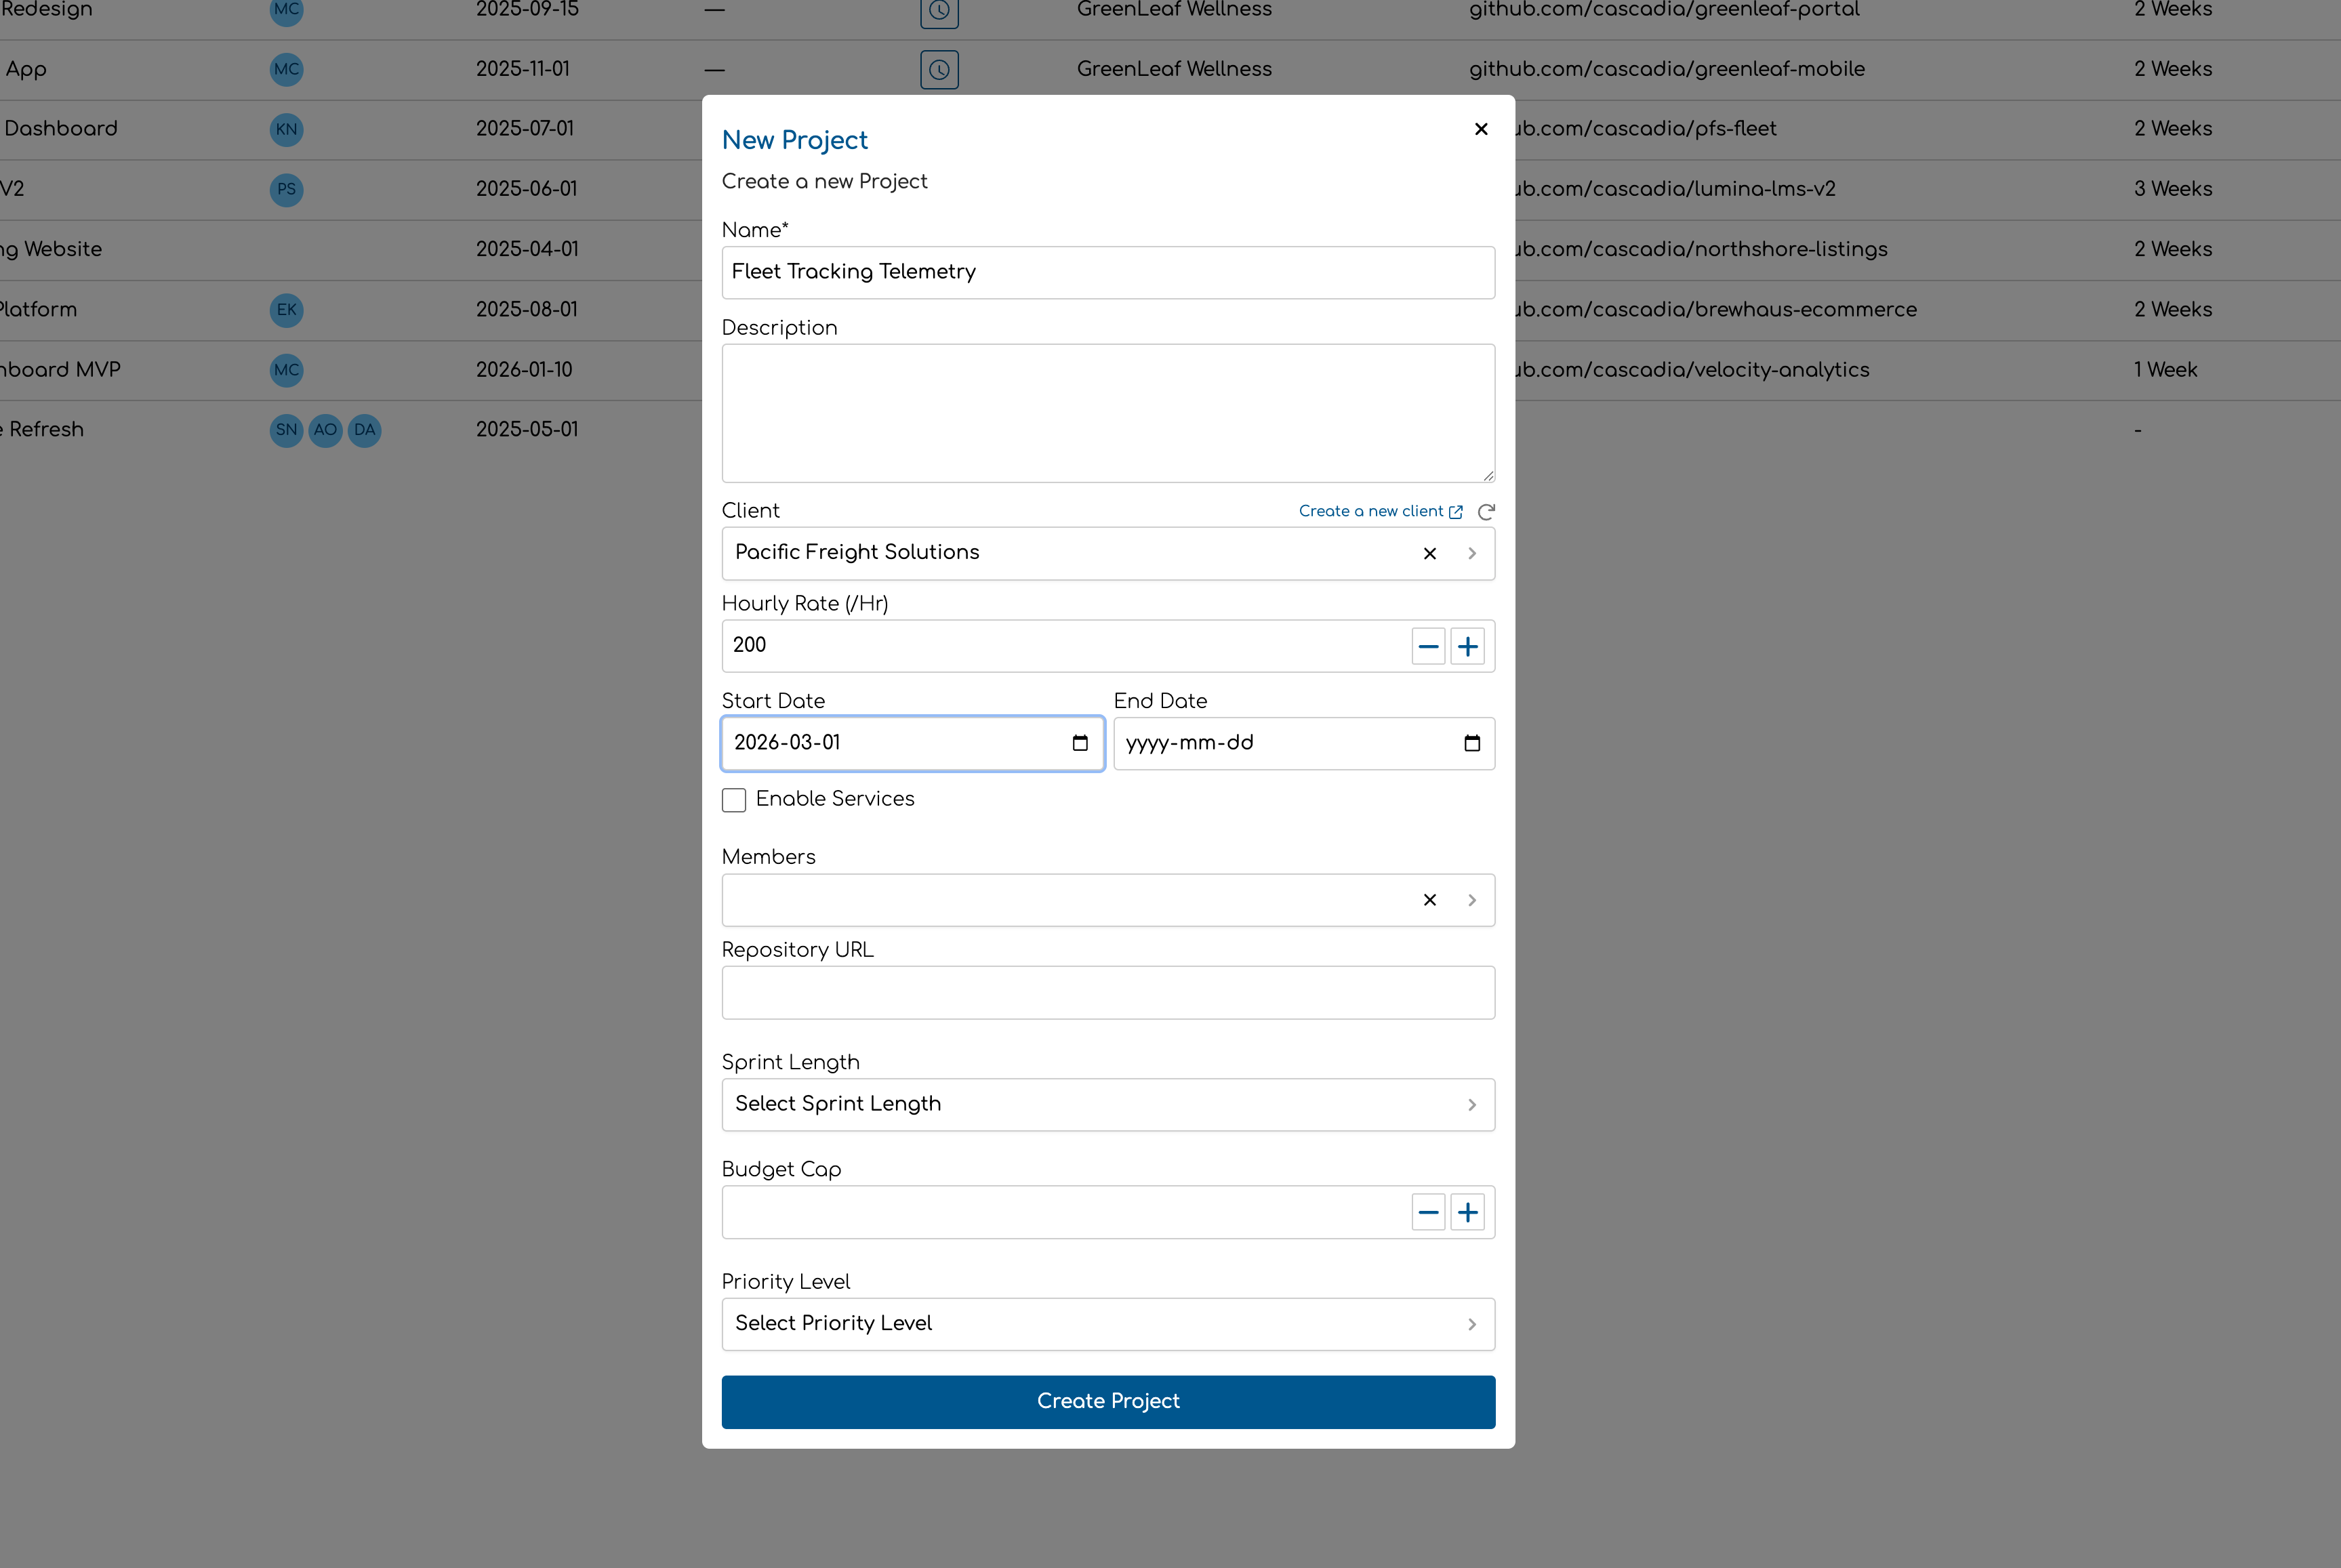
Form Fields
| Field | Required | Description |
|---|---|---|
| Name | Yes | A descriptive name for the project (e.g., "Acme Corp Annual Audit", "Riverside Condo Design"). Maximum 255 characters. |
| Description | No | Optional notes about the project scope or details. |
| Client | No | The client this project is for. Select from your existing clients, or click Create a new client to add one. If you've just created a client and don't see it in the list, click the refresh icon next to the label. |
| Hourly Rate (/hr) | No | A default hourly rate for this project. This rate is used as a fallback in the rate hierarchy when no more specific rate is set. Must be $0.00 or higher. |
| Start Date | No | When the project begins. For reference only — does not restrict time entry logging. |
| End Date | No | When the project ends. For reference only — does not restrict time entry logging. |
| Enable Services | No | Whether this project uses services to categorize work. When enabled, the services section appears where you can add services and assign team members per service. See Managing Project Services & Rates. |
| Members | No | The team members who can log time to this project. Only visible when services are disabled — when services are enabled, members are assigned through individual services instead. |
A success notification confirms the project was created.
Editing a Project
Click any project in the list to open its detail page. From here you can update all the fields from creation, plus additional options:
- Change the name, description, client, hourly rate, or dates
- Add or remove team members (non-service projects)
- Add, remove, or reconfigure services (service-based projects)
- Set or adjust the lock date (see below)
Click Save Changes when you're done. The button is disabled until you modify something.
Project Fields Reference
| Field | Type | Editable | Notes |
|---|---|---|---|
| Name | Text | Yes | Required. Max 255 characters. |
| Description | Text | Yes | Optional. |
| Client | Dropdown | Yes | Optional. Select from existing clients. |
| Hourly Rate | Currency | Yes | Optional. Fallback rate for time entries. Must be $0.00 or higher. |
| Start Date | Date | Yes | Optional. For reference only. |
| End Date | Date | Yes | Optional. For reference only. |
| Enable Services | Toggle | Yes | Cannot be disabled once services have been added — remove all services first. |
| Members | Multi-select | Yes | Only shown when services are disabled. |
| Lock Entries Until | Date | Yes (edit only) | Locks time entries on or before this date. Not available on the creation form. |
Setting a Project Lock Date
The Lock entries until field appears on the project edit page. It prevents non-admin team members and contributors from creating, editing, or deleting time entries dated on or before that date.
To set or advance a lock date:
- Open the project detail page.
- Enter or change the date in the Lock entries until field.
- Click Save Changes.
- A confirmation dialog appears: "All time entries on or before {date} will be locked. Members and contributors won't be able to edit or delete them."
- Confirm to apply the lock.
Who can do what with locked entries
| Action | Team Member / Contributor | Admin / Owner |
|---|---|---|
| View locked entries | Yes | Yes |
| Edit or delete locked entries | No | Yes |
| Set or change the lock date | No | Yes |
Lock dates are useful for closing off billing periods. For example, after sending January invoices to clients, set the lock date to January 31 so no one accidentally modifies entries that have already been billed.
For more on how lock dates interact with rate locking, see Rate Locking — Project Lock Date.
Assigning Team Members
How team members are assigned depends on whether the project uses services:
Without services: Use the Members multi-select on the project form to assign team members directly. Each team member can optionally have a custom project-member rate.
With services: Team members are assigned to individual services within the project. Use the service cards in the services section to add members per service. See Managing Project Services & Rates for details.
Deleting Projects
Projects can be permanently deleted. This removes the project and all its associated time entries — this action cannot be undone.
Deleting a single project
- Open the project detail page.
- Use the delete action (accessible via the actions menu).
- Confirm the deletion.
Bulk deleting projects
- On the project list, select the projects using the row checkboxes.
- Open the actions menu and click Delete.
- Confirm the deletion.
You can delete up to 100 projects at a time.
Viewing Project Time Entries
From the project list, you can quickly log time for any project by clicking the time entry icon on the project row. This opens the time entry form with the project pre-selected.
From the project detail page, you can also log time directly via the same icon in the header.
Tips
- Set a default hourly rate. Even if you plan to override rates at the team member or service level, a project rate provides a sensible fallback. Without any rate configured, time entries will have no billable value.
- Use lock dates after invoicing. Once you've sent invoices for a billing period, set the lock date to the end of that period. This prevents accidental edits to entries that have already been billed — especially useful for firms with many team members logging time.
- Choose the right project mode. If your team performs different types of work on a project (e.g., an architecture firm doing both "Schematic Design" and "Construction Administration"), enable services. If all work is billed at the same rate, a simpler non-service project keeps things straightforward.
- Link projects to clients. Even if you have just one project per client, the client link helps with reporting and invoicing. If you haven't created the client yet, use the "Create a new client" link right from the project form.