
Bulk Managing Time Entries
Invup lets you select multiple time entries and act on them at once — useful when you need to clean up test data, remove duplicate entries, or clear out entries from a cancelled project. This page covers how to select, filter, sort, and bulk-delete time entries.
Selecting Time Entries
The time entries list has a checkbox on each row. You can select entries one at a time, or use the checkbox in the table header to select all entries on the current page.
Once at least one entry is selected, an actions menu (three-dot icon) appears in the table toolbar. This menu contains the available bulk actions.
Bulk Deleting Time Entries
To delete multiple time entries at once:
- Select the entries you want to delete using the row checkboxes.
- Open the actions menu and click Delete.
- A confirmation dialog appears showing how many entries will be deleted — for example, "Are you sure you want to delete these 5 time entries?"
- Confirm the deletion.
A success notification confirms the entries were removed. You can delete up to 100 entries at a time.
Locked entries
If a time entry falls on or before a project's lock date, it cannot be deleted by regular team members or contributors. Locked entries show a lock icon next to their date and have their action buttons disabled. See Rate Locking for details on project lock dates.
Owners and admins can still delete locked entries.
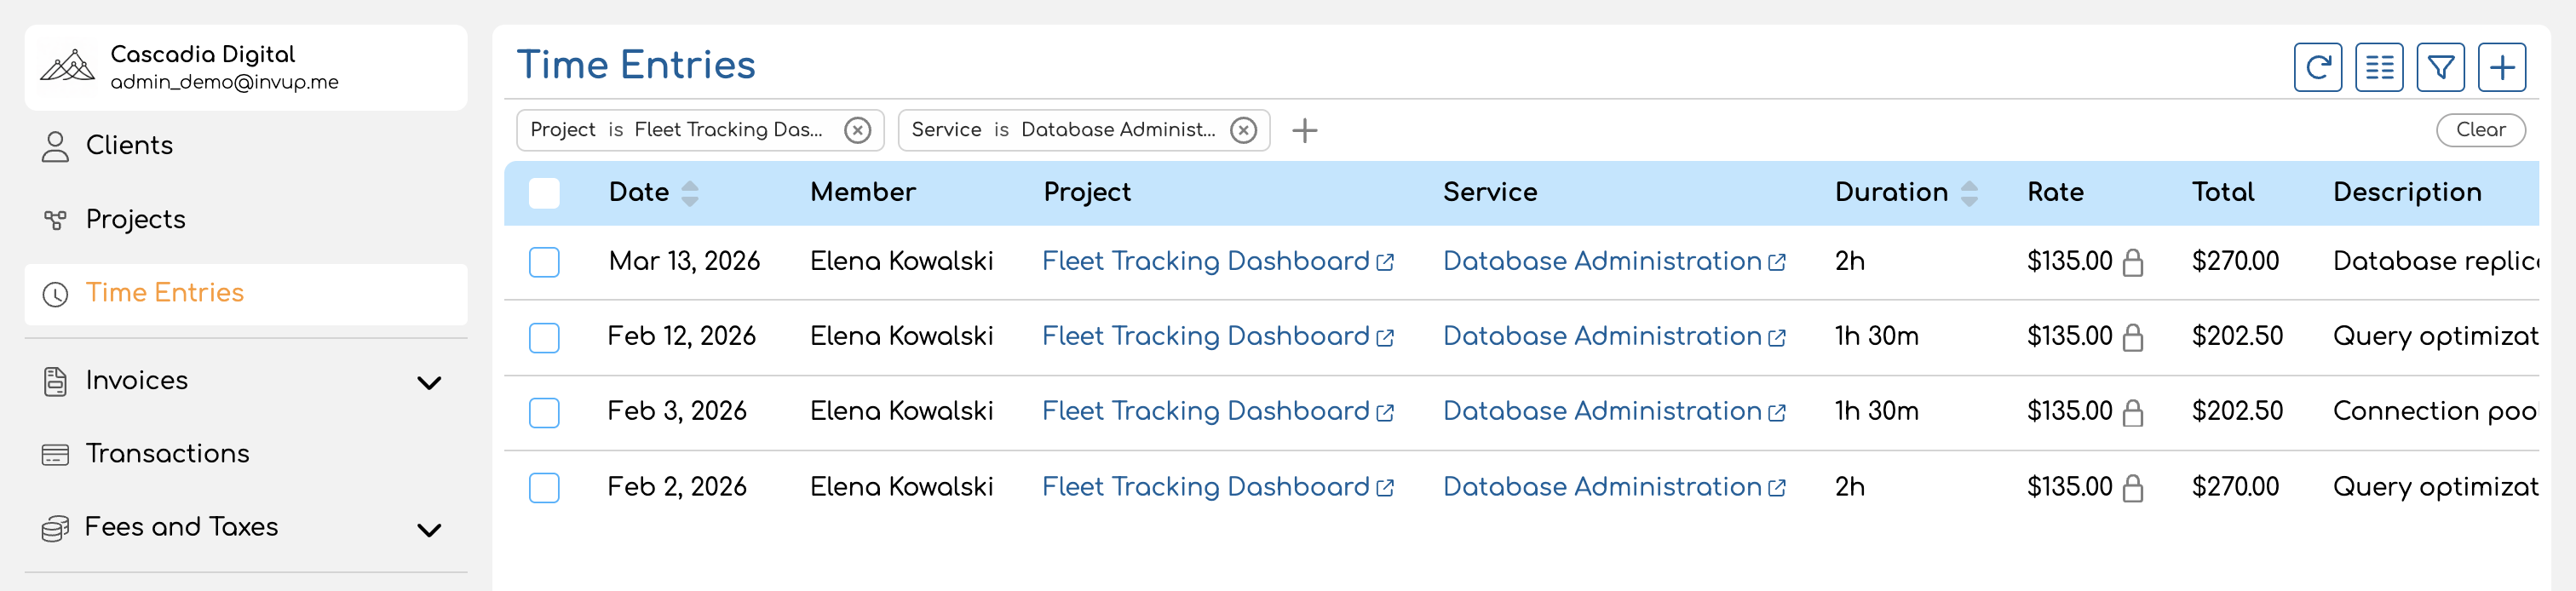
Filtering Time Entries
Filters narrow the list to show only the entries you care about. Click the Add Filter button above the table to add a filter, then choose a field and value.
Available filters
| Filter | What it does |
|---|---|
| Project | Show only entries for a specific project |
| Service | Show only entries tagged with a specific service |
| Date | Show entries within a date range — includes presets like "This week", "Last week", "This month", and "Last month", or you can set a custom range with "From" and "To" dates |
| Duration | Filter by logged duration (numeric comparison) |
| Member | Show only entries logged by a specific team member (admin view only — see below) |
Active filters appear as removable pills above the table. Click the x on a pill to remove that filter, or use Clear Filters to reset all filters at once.
Filters and selection work well together — filter the list first to narrow it down, then select and delete the entries that match.
Sorting Time Entries
Click any sortable column header to sort the list. Click again to reverse the sort direction. The default sort is by date, newest first.
Sortable columns
| Column | Sort behavior |
|---|---|
| Date | Chronological order (default: newest first) |
| Duration | Shortest to longest, or longest to shortest |
| Created At | Order by when the entry was originally logged |
Admin Bulk Management
Owners and admins have access to an expanded view that shows time entries across all team members in the organization — not just their own.
What's different for admins
| Capability | Team member | Owner / Admin |
|---|---|---|
| View entries | Own entries only | All entries across the organization |
| Filter by team member | Not available | Available — use the Member filter |
| Bulk delete own entries | Yes | Yes |
| Bulk delete other members' entries | No | Yes |
| Delete locked entries | No | Yes |
The admin view includes a Member column showing who logged each entry. Contributors are identified with a "Contributor" badge next to their name.
Admins can filter the list to a specific team member, select their entries, and bulk-delete them — useful when offboarding someone or correcting entries logged to the wrong project.
Tips for Efficient Time Entry Management
- Filter before selecting. Narrow the list to the relevant project, date range, or team member first, then select and delete. This avoids accidentally removing entries you wanted to keep.
- Use date range filters for period cleanup. When clearing entries from a specific billing period, set the date filter to that range so only those entries appear.
- Check for locked entries first. If some entries aren't selectable, they may be within a project's lock date. Ask an admin to handle those, or adjust the project lock date if appropriate.
- Admins: use the member filter. When managing entries for a specific team member (e.g., during offboarding), filter by their name first to isolate their entries from the rest of the organization.